The Ultimate Guide to a Sump Pump Replacement: A Step-by-Step Guide for Homeowners
Replacing a sump pump can seem like a daunting task, but with the right guidance, it's a manageable DIY project that can save you time and money. In this comprehensive guide, we'll walk you through every step of the process, ensuring you're well-prepared to tackle your sump pump replacement with confidence.
Table of Contents
- Introduction to a Sump Pump Repair
- Why You Might Need to Replace Your Sump Pump
- Understanding Sump Pumps: Types and Functions
- Tools and Materials You'll Need
- Safety Precautions
- Step-by-Step Guide to Replacing Your Sump Pump
- Step 1: Disconnect the Power
- Step 2: Remove the Old Sump Pump
- Step 3: Prepare the New Sump Pump
- Step 4: Install the New Sump Pump
- Step 5: Test the New Sump Pump
- Troubleshooting Common Issues
- Maintenance Tips for Your Sump Pump
- Frequently Asked Questions
- Conclusion
Introduction To a Sump Pump Repair
A sump pump is a crucial component in many homes, especially those prone to flooding or high water tables. Its primary job is to keep your basement dry by pumping out excess water that accumulates in the sump basin. Over time, sump pumps can wear out and require replacement. This guide is designed to provide you with all the information you need to replace your sump pump efficiently and effectively.
Why You Might Need to Replace Your Sump Pump
There are several reasons why you might need to replace your sump pump:- Age: Most sump pumps have a lifespan of 7-10 years. If your pump is within this age range, it might be time for a replacement.
- Performance Issues: If your sump pump isn't keeping your basement dry, it may be due to a mechanical failure or reduced efficiency.
- Noise: Excessive noise or unusual sounds can indicate that your sump pump is struggling and might need to be replaced.
- Frequent Cycling: If your sump pump is turning on and off frequently, it might be a sign that it's not functioning properly.
Signs of a Failing Sump Pump
Understanding the signs of a failing sump pump can help you take action before a complete failure occurs. Look out for the following indicators:
- Visible Rust: Rust or corrosion on the pump can indicate wear and tear.
- Vibrations: Excessive vibrations or shaking during operation could signal a problem with the motor or impeller.
- Increased Humidity: If your basement feels more humid than usual, your sump pump might not be working effectively.
- Pooling Water: The most obvious sign is pooling water or damp spots in your basement, indicating the pump is not removing water as it should.
Why Timely Replacement is Crucial
Delaying the replacement of a failing sump pump can lead to significant water damage, mold growth, and structural issues in your home. It's essential to address the problem promptly to avoid costly repairs and health hazards.
Understanding Sump Pumps: Types and Functions
Sump pumps come in various types, each suited to different needs and installation scenarios. Understanding these differences can help you choose the right pump for your home.
Types of Sump Pumps
1. Primary Sump Pumps - These are the main pumps used in most homes and can be either submersible or pedestal.
- Submersible Pumps: Placed underwater in the sump basin, they are typically quieter and more efficient.
- Pedestal Pumps: Positioned above the sump basin, making them easier to service but generally noisier.
2. Backup Sump Pumps - Provide an additional layer of protection, operating when the primary pump fails or during power outages.
- Battery-Operated Backup Pumps: Run on batteries and kick in when the main pump fails.
- Water-Powered Backup Pumps: Use the home's water supply to operate, not requiring electricity.
3. Combination Sump Pumps - These systems include both a primary pump and a backup pump in one unit, offering comprehensive protection.
Functions of a Sump Pump
- Water Removal: The primary function is to remove water from the sump basin and discharge it away from your home.
- Flood Prevention: Prevents basement flooding by automatically activating when water reaches a certain level.
- Moisture Control: Helps maintain a dry basement, reducing the risk of mold and mildew growth.
How Much Is A Sump Pump Replacement Cost?
The average cost of a new sump pump installation depends on the type you choose. A submersible pump typically costs between $500 and $1,200, while a pedestal pump will run you $450 to $650. Labor can add additional $200 to $1,000 depending on the contractor. Ultimately, this DIY guide will help you save on the hefty labor costs. When replacing a sump pump, it is important to make sure the old unit's power needs are matched to the new one for smooth transition. Going with a larger pump may mean larger pipes and potentially a higher voltage therefore incresing the overall costs associated with installation.
Ways To Minize The Cost of a Sump Pump Replacement
- Replace sump pump filters regularly to prevent clogged drains.
- Buy a battery backup to keep your sump pump working during power outages.
- If your basement has water problems frequently it maybe a better idea to double pump for better drainage.
- Install an alarm or sensor to alert you when the levels of water are above capacity in the pump.
- Use a radon cover over the sump basin, so noxious gas doesn't pass into your house if it is present in the water.
Tools and Materials You'll Need
Before you start, make sure you have the following tools and materials:
- New sump pump
- Pipe wrench
- Screwdriver
- PVC pipes and fittings
- Hose clamps
- Check valve
- Teflon tape
- Utility knife
- Bucket or container for water
- Work gloves
- Safety goggles
Detailed Tools and Materials List
New Sump Pump: Choose a sump pump with the appropriate horsepower for your needs. Consider factors such as the size of your basement and the water table in your area.
Pipe Wrench: A pipe wrench will help you loosen and tighten the fittings on the discharge pipe.
Screwdriver: A flathead or Phillips screwdriver will be needed to remove and install screws on the sump pump and its components.
PVC Pipes and Fittings: Depending on your setup, you may need additional PVC pipes and fittings to connect the new sump pump to the discharge line.
Hose Clamps: Hose clamps will secure the discharge pipe to the sump pump.
Check Valve: A check valve prevents backflow of water into the sump basin. Make sure to choose one that fits your discharge pipe size.
Teflon Tape: Teflon tape is used to create a watertight seal on threaded pipe connections.
Utility Knife: A utility knife will be handy for cutting pipes and materials.
Bucket or Container: Use a bucket to catch any water that might spill when removing the old sump pump.Work Gloves and Safety Goggles: Protect your hands and eyes from debris and sharp objects.
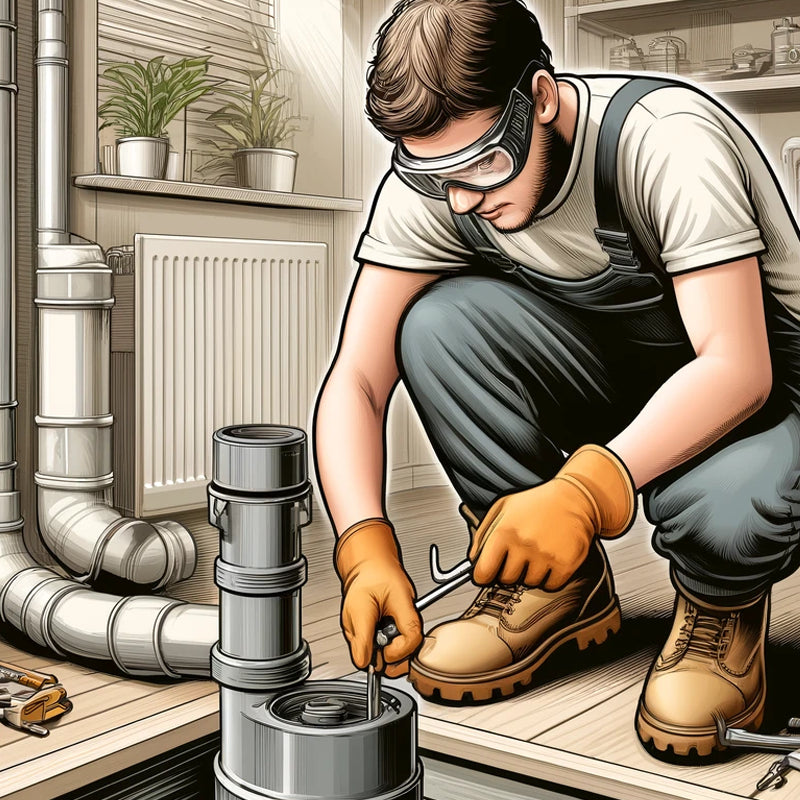
Safety Precautions
Safety should always be your top priority. Here are some important safety precautions to follow:
- Disconnect Power Source: Always disconnect the power to the sump pump before beginning any work.
- Wear Protective Gear: Use safety goggles and work gloves to protect yourself from debris and sharp objects.
- Avoid Water Contact: Make sure the area around the sump pump is dry to avoid any electrical hazards.
Additional Safety Tips
- Use a Ground Fault Circuit Interrupter (GFCI): Ensure your sump pump is plugged into a GFCI outlet to prevent electrical shock.
- Check for Gas Lines: Be aware of any gas lines or other utilities in the vicinity of your sump pump to avoid accidental damage.
- Have a Backup Plan: Keep a backup sump pump or a battery-operated pump on hand in case your main pump fails during the replacement process.
Step-by-Step Guide to Replacing Your Sump Pump
Step 1: Disconnect the Power
- Locate the Power Source: Find the outlet where your sump pump is plugged in and unplug it. If your pump is hardwired, turn off the circuit breaker that powers it.
- Ensure Safety: Double-check that there is no power running to the sump pump before you proceed.
Step 2: Remove the Old Sump Pump
- Drain the Basin: Use a bucket or container to remove any standing water from the sump basin.
- Disconnect the Discharge Pipe: Use a pipe wrench to loosen the clamps or fittings connecting the discharge pipe to the pump.
- Sump Pump Removal: Carefully lift the old sump pump out of the basin. Be prepared for some residual water to spill out.
Step 3: Prepare the New Sump Pump
- Check Compatibility: Ensure that the new sump pump is compatible with your existing sump basin and discharge pipe.
- Attach the Check Valve: Install a check valve on the discharge pipe to prevent backflow. Use Teflon tape on the threads to ensure a tight seal.
- Test Fit: Place the new sump pump in the basin to ensure it fits properly.
Step 4: Install the New Sump Pump
- Connect the Discharge Pipe: Reattach the discharge pipe to the new pump, securing it with hose clamps or fittings.
- Position the Pump: Make sure the pump is positioned correctly in the basin, with the float switch free to move without obstructions.
- Secure the Pump: If necessary, secure the pump in place with brackets or straps to prevent it from shifting during operation.
Step 5: Test the New Sump Pump
- Reconnect the Power: Plug the pump back into the power source or turn the circuit breaker back on.
- Fill the Basin: Pour water into the sump basin to activate the pump and test its operation.
- Check for Leaks: Inspect all connections for any signs of leaks. Tighten any loose fittings as needed.
Troubleshooting Common Issues
If you encounter any issues during or after the installation, here are some common problems and solutions:
- Pump Not Turning On: Ensure the power source is connected and the circuit breaker is on. Check for any tripped breakers or blown fuses.
- Excessive Noise: Check for debris in the pump or basin. Ensure the pump is securely fastened to prevent vibrations.
- Pump Running Continuously: Adjust the float switch to ensure it moves freely and isn't stuck in the "on" position.
Additional Troubleshooting Tips
Float Switch Issues: If the float switch is stuck or not moving freely, it might need cleaning or replacement. Debris can often cause the switch to malfunction.
Air Lock: Air trapped in the discharge line can prevent the pump from functioning correctly. Bleed the line by loosening the check valve to release any trapped air.
Power Supply Problems: Ensure the outlet is functioning correctly by testing it with another appliance. Faulty wiring or a malfunctioning outlet could be the issue.
Maintenance Tips for Your Sump Pump
Regular maintenance can extend the life of your sump pump and ensure it operates efficiently
- Quarterly Inspections - Check the pump and basin every few months for debris, corrosion, or wear.
- Annual Testing - Test the pump at least once a year by pouring water into the basin to ensure it activates and discharges properly.
- Clean the Basin - Remove any sediment or debris from the basin to prevent clogs and improve pump efficiency.
- Replace the Check Valve - Consider replacing the check valve every few years to maintain proper function.
Detailed Maintenance Schedule
Monthly
- Visual Inspection: Look for any signs of wear or damage.
- Check Power Source: Ensure the power source is secure and functioning.
Quarterly
- Test the Pump: Pour water into the basin to activate the pump.
- Clean the Basin: Remove any debris or sediment.
Annually
- Full Inspection: Perform a thorough inspection of the pump, float switch, and check valve.
- Lubricate Components: If applicable, lubricate any moving parts as recommended by the manufacturer.
Frequently Asked Questions
Q: How long does a sump pump typically last?
A: Most sump pumps last between 7-10 years, depending on usage and maintenance.
Q: Can I replace a sump pump myself?
A: Yes, with the right tools and instructions, replacing a sump pump can be a DIY project.
Q: How often should I test my sump pump?
A: It's recommended to test your sump pump at least once a year, or more frequently if your basement is prone to flooding.
Q: What size sump pump do I need?
A: The size of the sump pump depends on the volume of water that needs to be pumped and the height it needs to be lifted. Consult with a professional if you're unsure.
Q: What is a check valve and why is it important?
A: A check valve prevents water from flowing back into the sump basin after it has been pumped out, ensuring efficient operation and preventing damage to the pump.
Q: Can I install a backup sump pump?
A: Yes, installing a backup sump pump, such as a battery-operated or water-powered pump, can provide additional protection in case of a primary pump failure.
Q: What should I do if my sump pump smells bad?
A: A bad smell can indicate stagnant water or bacterial growth. Clean the basin and pump thoroughly, and ensure proper drainage.
In-Depth Troubleshooting and Maintenance Advice
Advanced Troubleshooting Tips
Motor Issues
Symptom - Pump motor runs but no water is discharged.
Possible Causes - Clogged intake, impeller damage, or air lock.
Solution - Clean the intake screen, check and replace the impeller if damaged, and ensure the discharge line is free of air locks.
Float Switch Problems
Symptom - Pump does not turn off.
Possible Causes - Stuck or obstructed float switch.
Solution - Clean around the float switch to remove debris. If the problem persists, consider replacing the float switch.
Electrical Problems
Symptom - Pump does not start at all.
Possible Causes - Power supply issues, blown fuse, or faulty wiring.
Solution - Check the power supply and outlet. Replace any blown fuses and inspect wiring for damage. Consult an electrician if necessary.
Comprehensive Maintenance Tips
Seasonal Maintenance (Spring & Fall)
- Perform a thorough inspection and cleaning of the sump pump and basin.
- Test the pump with water to ensure it activates and deactivates correctly.
- Inspect the discharge line for any clogs or damage.
Long-Term Storage Tips
- If you plan to store your sump pump for an extended period, such as during home renovations:
- Clean and dry the pump thoroughly to prevent rust and mold growth.
- Store it in a dry, cool place away from direct sunlight.
- Seal any openings to prevent insects or debris from entering the pump.
Importance of Professional Maintenance
While DIY maintenance can handle most routine tasks, scheduling an annual professional inspection can ensure your sump pump's longevity and efficiency. Professionals can:
- Perform detailed electrical inspections.
- Check the integrity of the pump's components.
- Provide advanced cleaning and maintenance services.
- Ensuring Long-Term Protection
Conclusion
Replacing a sump pump is a task that many homeowners can tackle with the right guidance and tools. By following this comprehensive guide, you'll be well-equipped to replace your sump pump efficiently and safely. Regular maintenance and testing will ensure your sump pump continues to protect your home from water damage for years to come. If you encounter any issues or are unsure about any part of the process, don't hesitate to consult with a professional plumber.
If you're ready to replace your sump pump, gather your tools and materials, follow the steps outlined in this guide, and ensure your home remains dry and safe. For those who prefer professional assistance, don't hesitate to contact a trusted plumber to handle the installation and maintenance.
Remember, a well-maintained sump pump is your first line of defense against basement flooding. Regular inspections, timely replacements, and proper maintenance will keep your home protected for years to come.